What is aperture? I’m sure you’ve heard of it. If you’re a professional you know how much aperture affects the look of an image. But if you’re new to photography, you’ve probably heard the word thrown around and wonder how it plays into the look of a photo.
Aperture, shutter speed, and ISO are the three main players in getting a correct exposure. Many people think there is only one correct exposure setting, but this is far from the truth. Shutter speed is easy to understand – slower allows in more light and faster allows in less and freezes movement. Aperture works hand in hand with the shutter. Aperture affects the depth of field in a photograph. It is often noted as an “F Stop”. a 1.5 aperture is displayed as f/1.4. The smaller the number, the more wide open the lens opening is allowing in more light. Think of your pupil dilating to allow in more light. It brings a certain area into focus while everything else is blurred. The larger the number, the smaller the lens opening, allowing in less light, but creating a broader plain of focus. On a sunny day, squint your eyes and note how everything is in focus.
With portrait work, photographers love to work at lower apertures. Among my favorite lens to use is my 50mm 1.4 lens which gives me beautiful bokeh (blurred background). With landscape photography, it is desired to have everything in the image crisp and in focus – so photographers use a higher aperture number.
When you want to change your depth of field, you will also be changing your shutter speed to accommodate the lens opening. I took Kai outside today to show you how aperture affects the background of an image. This first image is just to show you that you can do a portrait session in the most random of places. In this case we were by the side of my house by the A/C unit. It was about 11am and we were in the shade of the big Oak Tree in the back field.
** Please note that these images are SOOC – STRAIGHT OUT OF CAMERA – there is no editing done whatsoever, aside from resizing for the web **
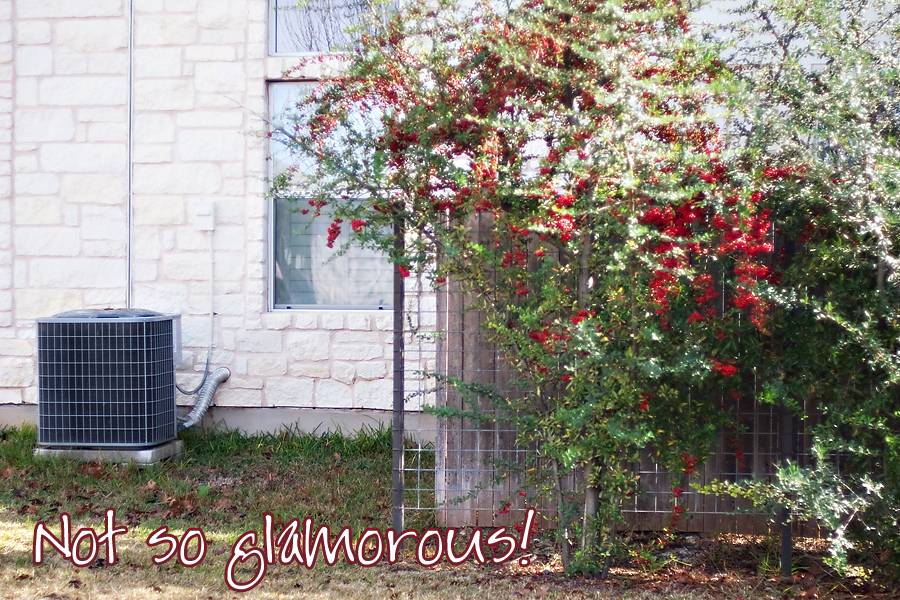
I really wanted to illustrate here how a higher aperture number keeps everything in focus, but as you can see at f/9 I was already down to a 1/60th shutter speed. If I went lower, I would get shaky. I believe that the kodak instant film cameras shoot at f/9 – so this is very much a “snap-shot” type look to images. Why is the shutter moving so slowly? Because at f/9 aperture, it’s like the camera is squinting – the shutter needs to stay open long enough to allow enough light on the sensor to get the correct exposure.

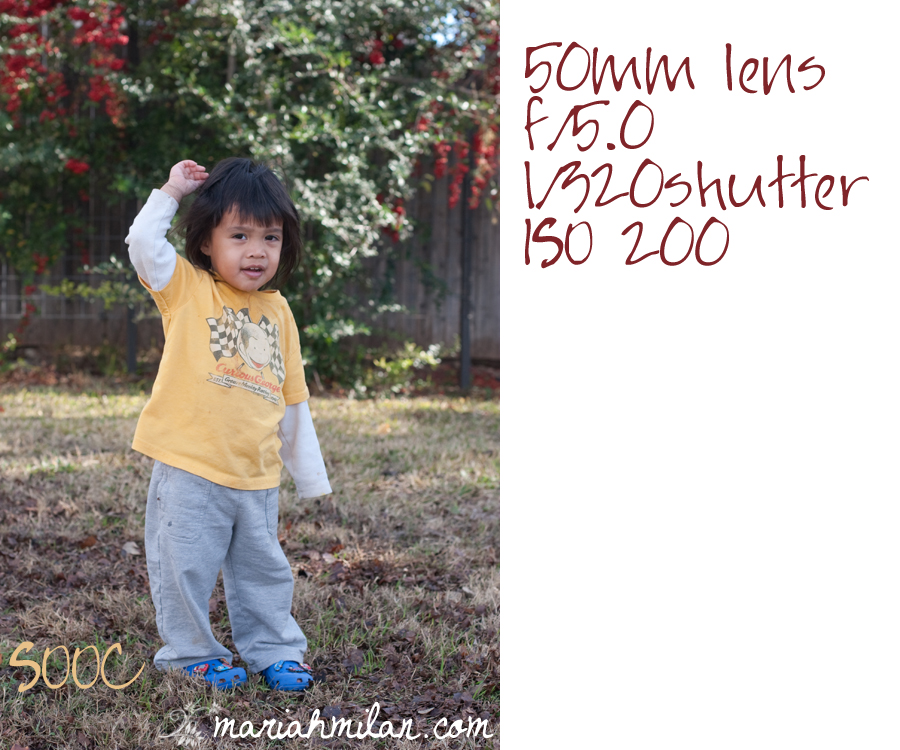
In this next image I moved my aperture to f/5. Because the lens opening is a bit larger, I could then adjust the shutter speed. At f/5, the background becomes a little more blurred in comparison to f/9.
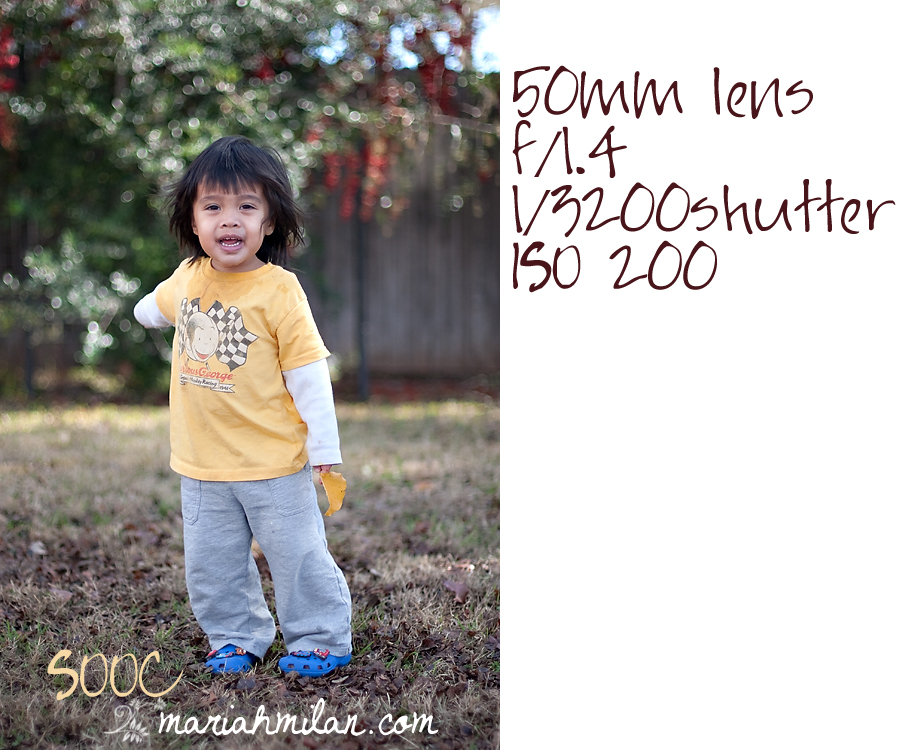
In this last example of Kai, I opened my lens up as far as it allows, f/1.4. Please note that different lenses can only go so far. Most consumer kit lenses only go to about f/4 – that’s ok! If you do want to invest in a great lens, I highly recommend the 50mm 1.4. Canon has since come out with a 50mm 1.2, which I hear is amazing. But the 1.4 is my workhorse and does the job great. Notice how when I open it up to 1.4, my shutter speed needs to be REALLY fast. Otherwise, this image would be completely overexposed.
Aperture is an amazing thing to experiment with. Please note that when you’re working with your lens “wide open” (shooting with low aperture numbers), your depth of field can also work against you. In this next example, I am photographing Kai at close range at f/1.4 and n1/3200 shutter speed. Because the planes of his face are at different lengths away from the camera, one part of his face is in focus while the rest is out of focus.
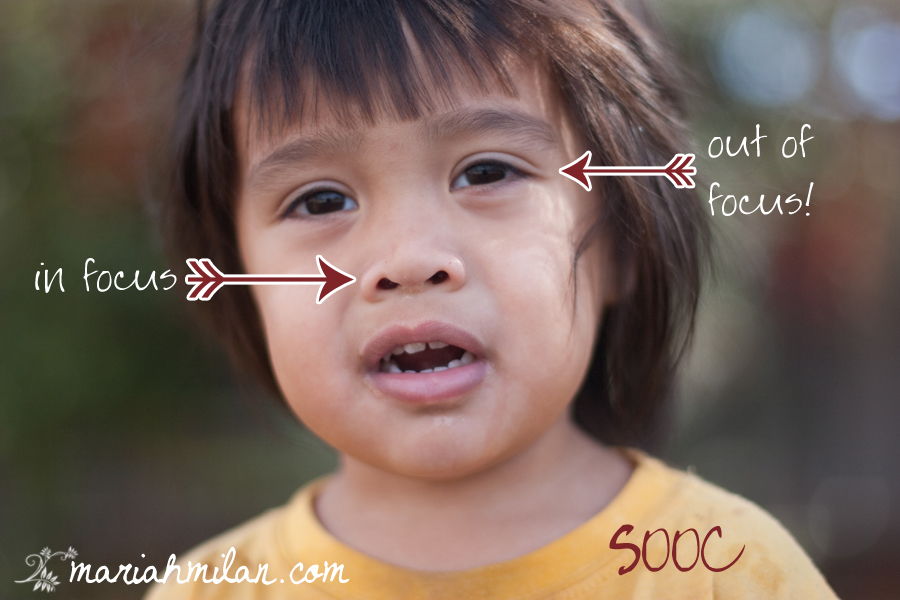
(pardon the drool and boogies here! Unedited!!)
If you are photographing a grouping of people, I recommend never going below f/5. I usually try to stay in the f/8 range if my lighting allows.
I would love to hear your questions and comments!! I am hoping to make these tutorials a monthly thing on the blog – so please ask away as to what you’d like to learn. My next tutorial will be about finding creative lighting in your home. This post will be updated with questions and answers as I receive them.
Post Updates:
I have been asked how to change the aperture settings on the camera. I shoot with a Canon 5D as well as a Canon 20D. All camera bodies vary slightly, so if your camera is set up differently than mine you’ll need to check your camera manual.
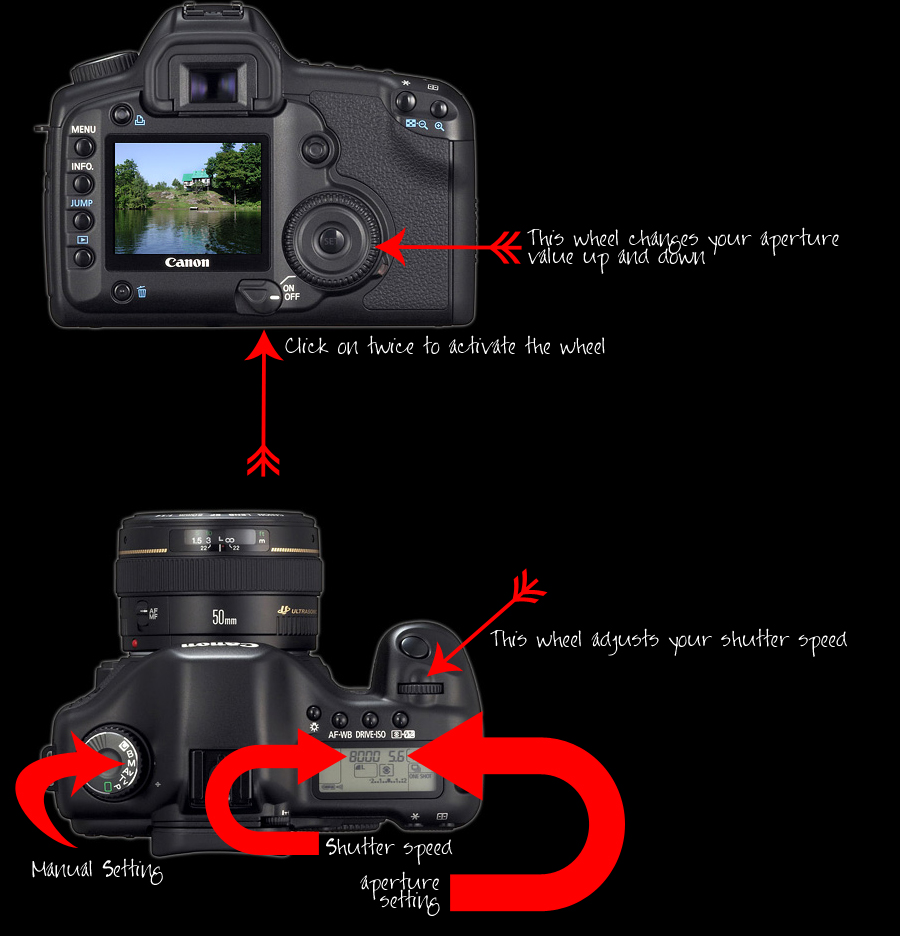
The camera pictures above are stock images and show that the camera is shooting a large Jpeg. I shoot in RAW format, but Jpeg shooting is just fine. I also shoot in manual mode, which leads to the next question… how do you know what is the correct exposure?
Most cameras come with a built in light meter. The light meter can sometimes be off slightly, but I’ve found that it is such a life saver. In the picture above, please note that there are a series of lines and dots at the bottom of the display. On the left it says -2…1…large dot…1…2
This is your light meter. When you are in P mode or M mode and you point the camera at something and half click to focus there will be a line that appears somewhere in this range. If it’s in the middle, you are close to your desired exposure range. If the line is to the left you are underexposed and if you’re to the right you’re overexposed. This is a great general tool to use. You can run your shutter wheel and aperture wheel various directions and watch how the light meter changes. It’s important to know that the light meter is a center focused meter. If you point it at something black it will have a different reading than if you point it at something white. Once you get it “in range”, it is your job as photographer to tweak it to the exposure that you want.
Ahhhh, how I love a good tutorial! Thanks, Mariah! <3
For us Morons, perhaps you could show (on the camera) where we would set the aperture with a big arrow?
I have updated the post with the directions on how to change aperture 🙂
As an even greater moron….lol I am getting the concept and LOVE the arrows! I have a Canon Rebel XSi and it looks different as heck! But this TOTALLY helps!! YOURE THE SWEETEST!!
okay, i have been practicing… and this will take a LOT of practice! Thanks Mariah!!!
cool